• Skip to primary navigation
  • Skip to main content
  • Skip to primary sidebar
  • Skip to footer

Live Like You Are Rich

on any income...

  • Finances
    • Save Money
    • Make Money
    • The Credit Game
    • Couponing
    • Tips & Warnings
    • Financial Fitness Bootcamp Course
  • LOVE with Family
    • Love
    • Pregnancy & Postpartum
    • Parenting
    • Faith
    • The Random & Important 
  • Home Improvements
    • Preparedness
    • Organization & Cleaning
    • Efficiency
    • Interior Design
    • Home Updates
    • Home One
    • Home Two
    • Home Three
  • DIY & Crafts
    • DIY’s & Crafts
    • Holidays
    • Valentines
    • Easter
    • 4th of July
    • Halloween
    • Thanksgiving
    • Christmas
  • Our Favorite Recipes
    • Quick and Easy Family Favorites
    • Breakfast
    • Lunch
    • Starters, Soups & Salads
    • Dinner
    • Desserts
    • Smoothies & Drinks
  • Hosting
  • My Book

How to Paint a Lamp Post

October 14, 2014 By: Anita

Share to Your Social Media

  • Share
  • Tweet

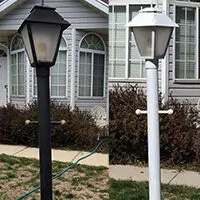
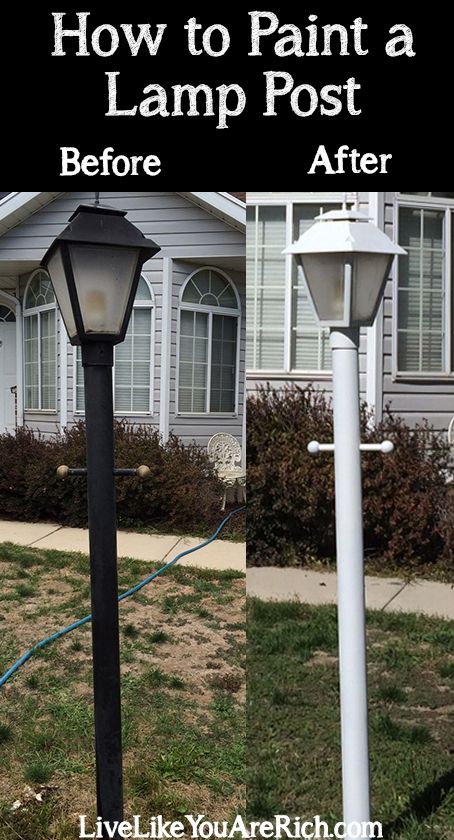
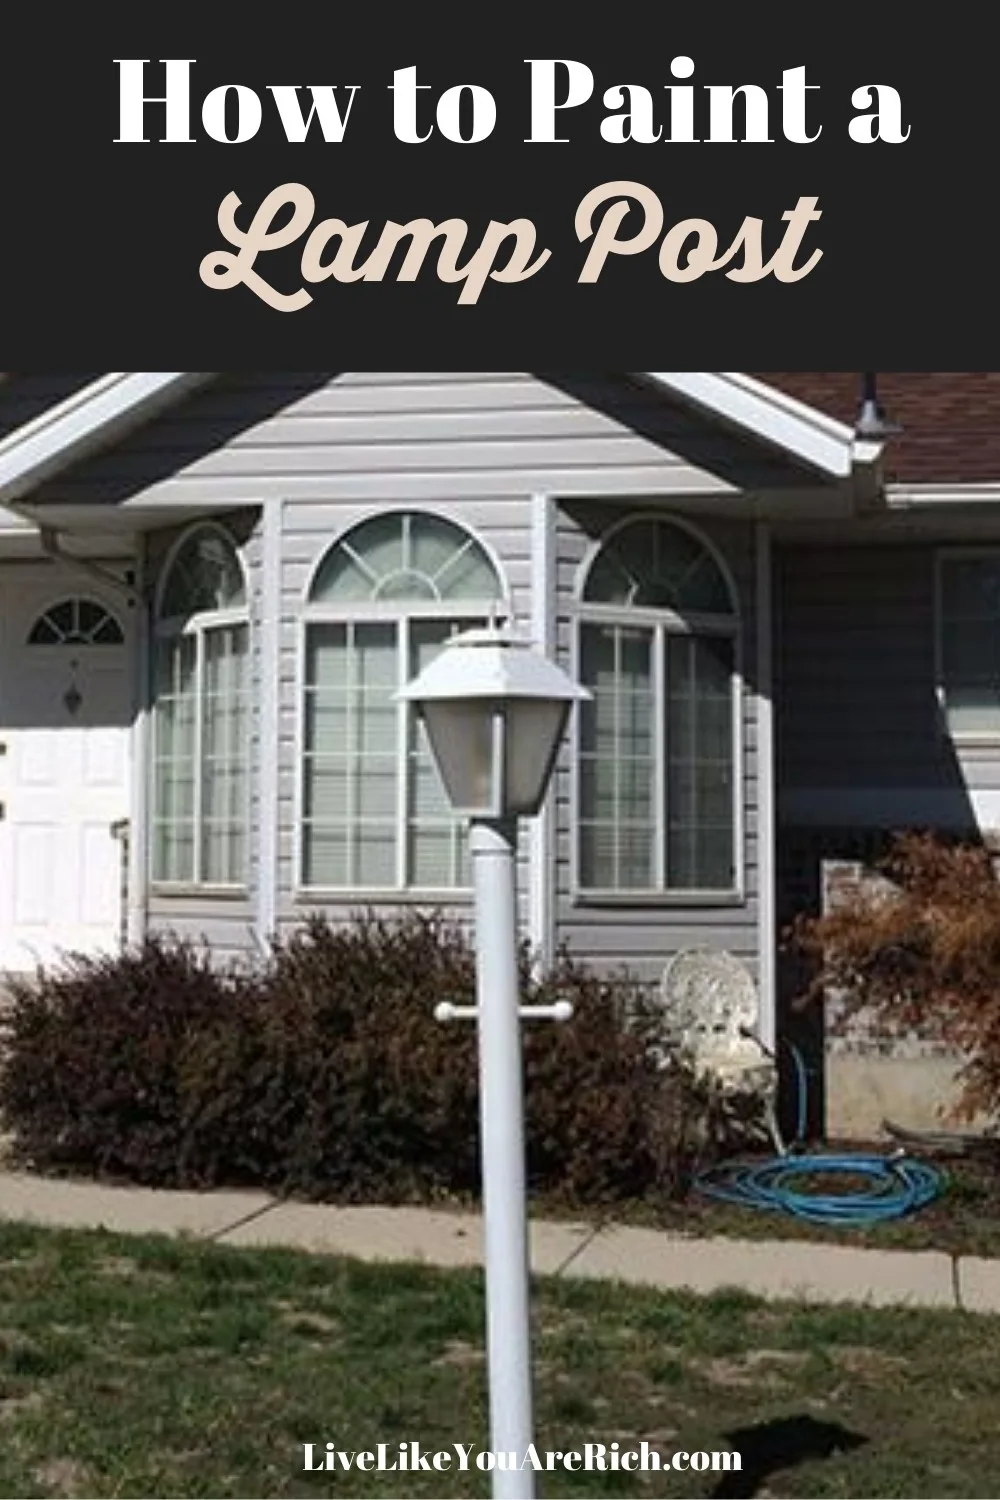
Our house is mainly white with blueish-grey siding and brown shingles. But our mailbox and lamp post are black and I really dislike the clash. So instead of buying a new lamp post, I decided to spray paint it. Below you will find steps to how to paint a lamp post.

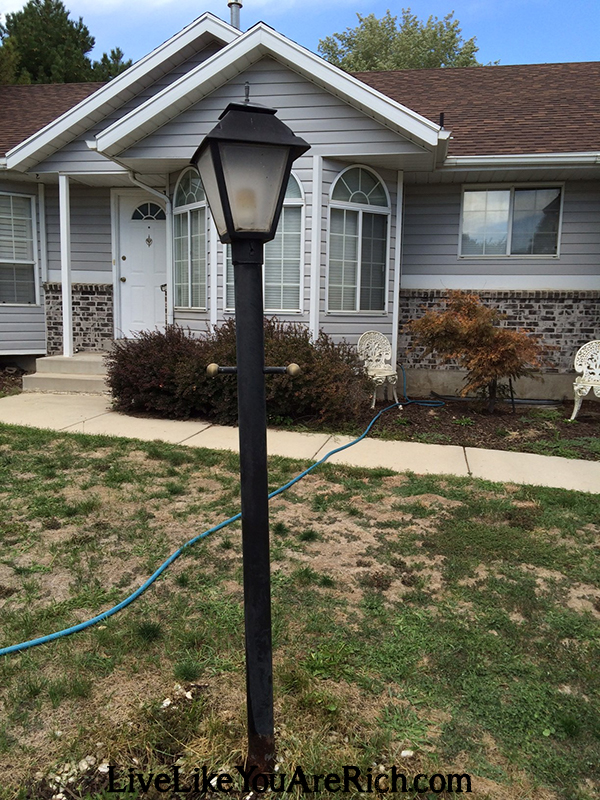
Please ignore our grass/weeds in these photos. We have been trying to revive our lawn since we bought the foreclosed upon home (with completely dead grass). Since we had no luck growing grass, only weeds, we decided to re-sod it completely next spring, thus it is really ugly right now.

How to Paint a Lamp Post

Step 1: Make sure the weather is right. You don’t want to spay paint a lamp post if the humidity or heat is too high. You also don’t want to spray paint in the cold either. Follow the directions on the cans of primer and spray paint. I primed and painted when it was about 70 degrees outside.

Typically spray paints will say that temperatures should be between 50-80 degrees Fahrenheit. Avoid painting when humidity is higher than 85%. It also best to avoid painting in direct sunlight. I painted on an overcast day which was good because the metal wasn’t too hot.

Step 2: Wash the item you are going to paint really well. I sprayed it with our hose and used a scrubbing pad on it. Let it dry out, or dry it completely.

How to Paint a Lamp Post

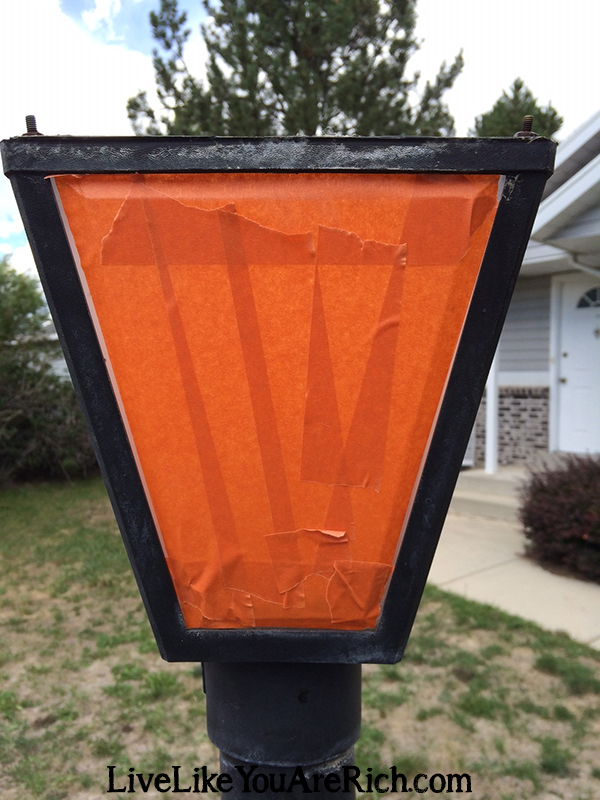
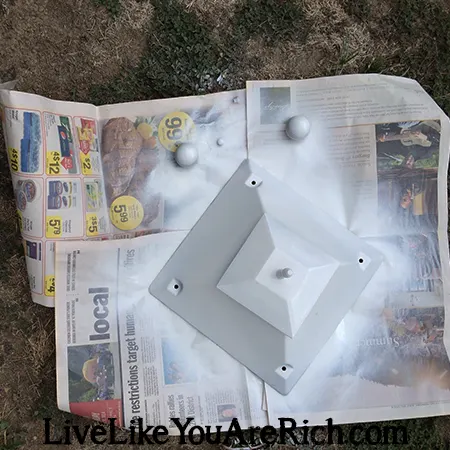
Step 3: Tape off anything you do not want to be painted. I taped off the lamp post windows.

How to Paint a Lamp Post

Step 4: Put newspapers around the base so that you don’t spray paint the lawn (if you care). I did not do this because I don’t have a lawn that I care about at the moment.

Step 5: Remove any nearby items you do not want over spray getting on (a vehicle parked in the driveway, a bike, etc.).

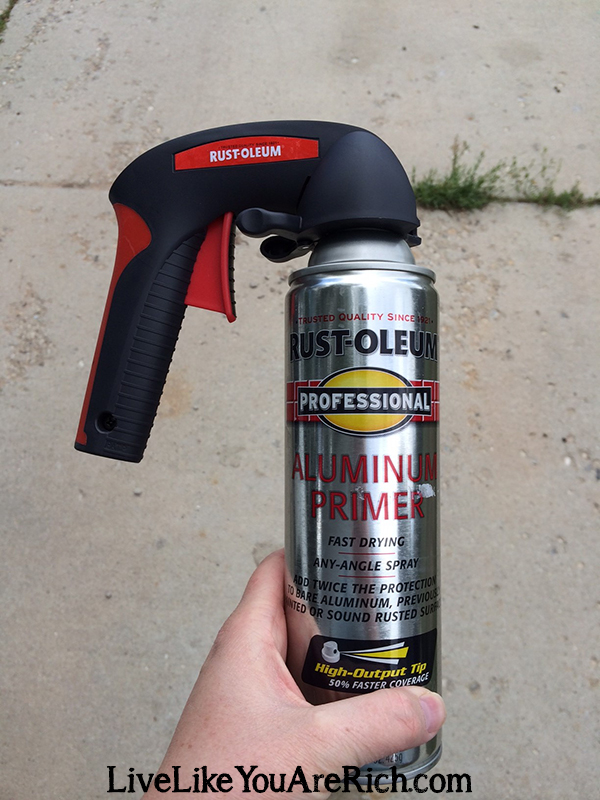
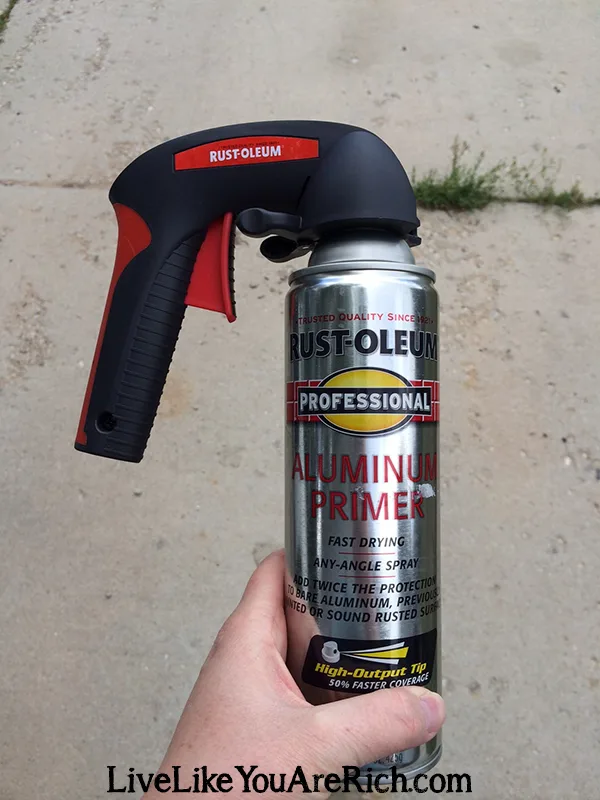
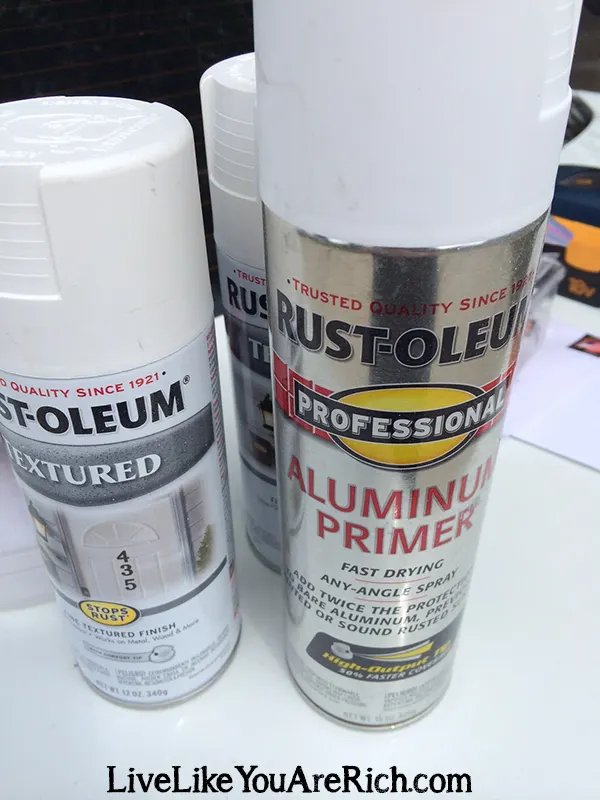
Step 6: Prime the lamp post. I used Rust-Oleum’s aluminum professional primer. I love using the Rust-Oleum’s spray paint handle/grip. It really makes the process go so much faster and is much easier on your hands, fingers, and wrists. How to Paint a Lamp Post

Allow the primer to dry for the recommended time in between coats (15 minutes or so depending on the brand). Add a second coat of primer.

How to Paint a Lamp Post

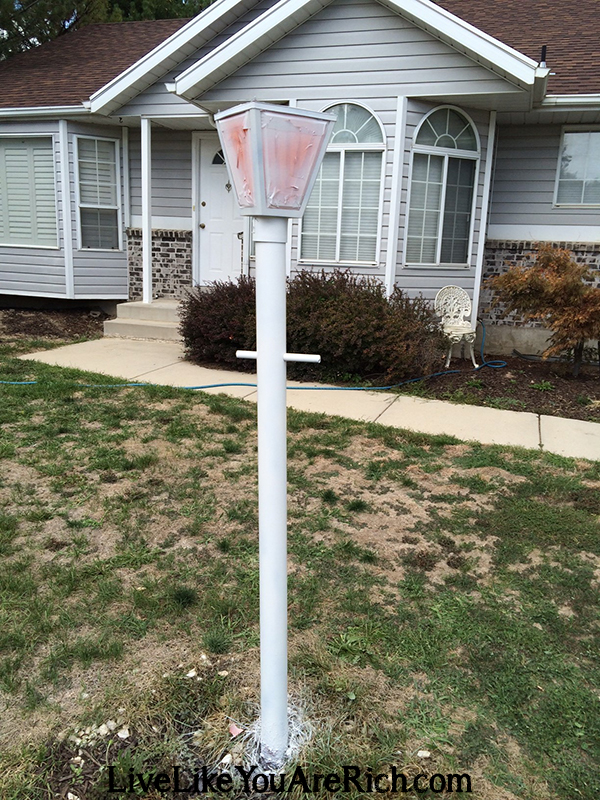
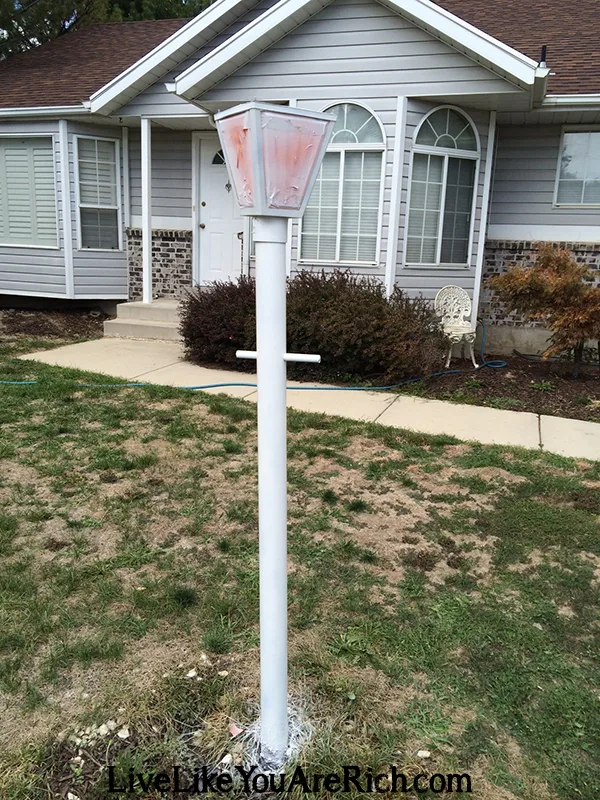
Step 7:  Once the primer is dry (about 15 minutes depending on the brand). Add the final coats with the type of paint you want. I used Rust-Oleum Textured outdoor white spray paint that stops rust. It is very important to spray lightly and to follow directions on the cans. I ended up adding about 2-3 light coats of spray paint on top of the primer.

How to Paint a Lamp Post

Step 8: Allow to dry and check for any really light areas, touch up.

Step 9: Follow the same instructions on the top of the lamp post, hardware, and/or other parts of the lamp post.

How to Paint a Lamp Post

Step 10: Remove tape and newspaper.

Finished!

How to Paint a Lamp Post


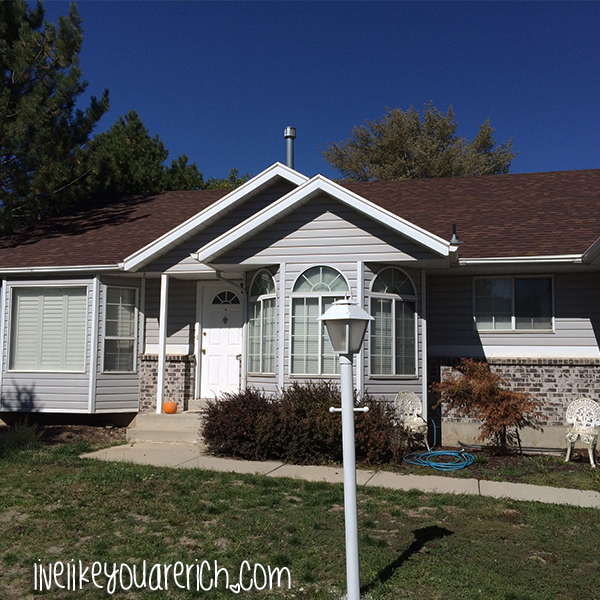
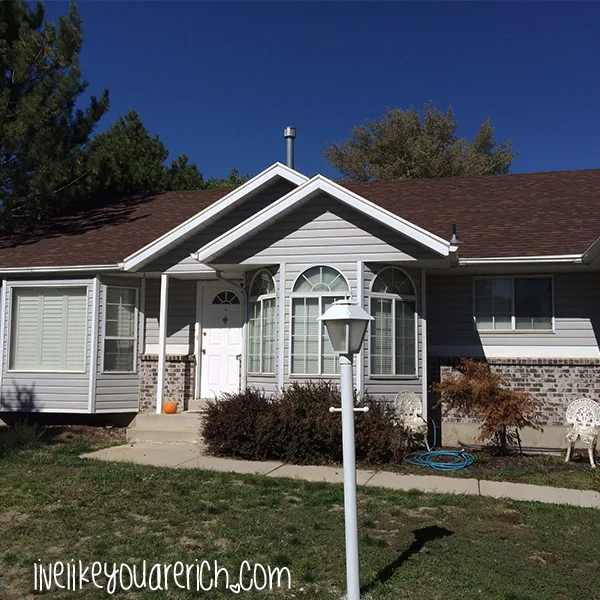
I painted my lamp post over one month ago and despite, hot days, heavy rains, and lately frost, etc. it looks just like the day I painted it. The paint job is holding up really really well. The best part? Now my lamp post looks new, matches my home, and doesn’t stick out like a sore thumb.

Enjoy your project. If you have questions/comments please leave them below.

Supplies

1- 15 oz can Rust-Oleum’s aluminum professional primer 

Rust-Oleum’s spray paint handle/grip

1- 12 oz can Rust-Oleum Textured outdoor white spray pain

newspaper or cardboard

painters tape
How to Paint a Lamp Post
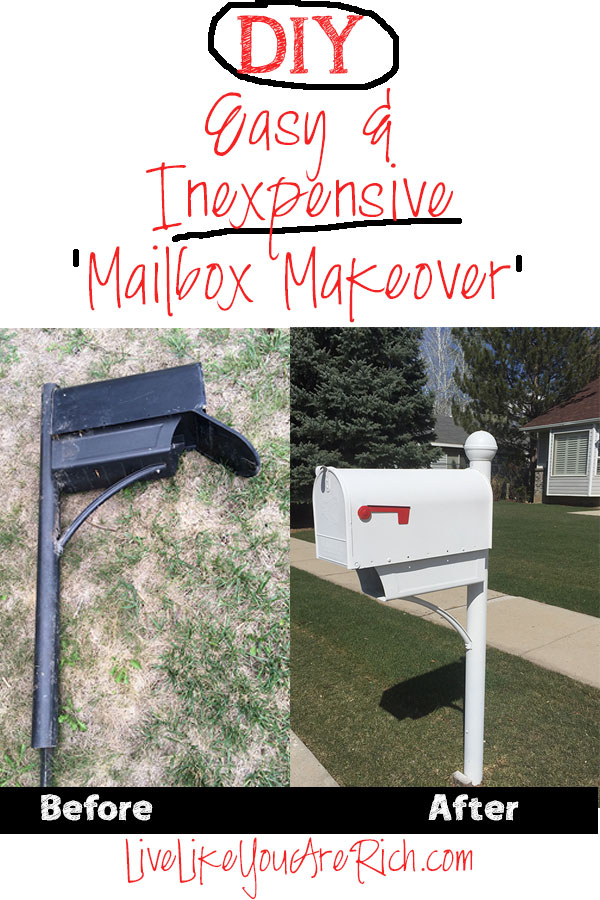
Here’s the before and after on our mailbox transformation… plus our new lawn.

how to paint a mailbox

LiveLikeYouAreRich.com

For other ‘rich living tips’ please subscribe, like me on Facebook, and follow me on Pinterest and Instagram.

Our old house is mainly white blueish-grey siding and and brown. But our mailbox and lamp post are black and I really dislike the clash. So instead of buying a new lamp post, I decided to spray paint it. Sharing the steps on how I paint my lamp post.


Related posts:

How to Spray Paint a Mailbox How to Paint and Stencil an Entire RoomHow to Paint and Stencil an Entire Room How to Paint, Decorate, Furnish, and Light a Dining Room for Under $200.00
Previous Post: « How to Make Money Taking Online Surveys
Next Post: $200.00 Giveaway!! »

Reader Interactions

Comments

  1. Meagan says

    May 23, 2016 at 1:53 pm

    Thanks for this, it is very timely. I was just looking at how the lamp post in our new house really needs to be repainted. Do you have any suggestions for dealing with rust?

    Reply
    • Anita Fowler says

      May 25, 2016 at 7:53 pm

      Hi! I’d hand sand and smooth off the rust as best as you can with some sand paper and then proceed with the following instructions and just paint over what you can’t get to come off ;). That’s maybe not the most professional advice but what I’d do personally.

      Reply
  2. Christina says

    January 9, 2017 at 11:01 pm

    What is the method for spraying the pole? Do you go back and forth across all the way down one side then move over, or go all the way around and then up while circling? Thank you for your post!

    Reply
  3. Amy says

    August 3, 2017 at 6:27 am

    Thank you for sharing how to paint a lamp post on Think Tank Thursday. I too have a black lamp post and think that it would look much better a different color. Shared and pinned.

    Reply
    • Anita Fowler says

      August 8, 2017 at 1:53 am

      Thank you!

      Reply
  4. nicole hurttgam says

    August 9, 2017 at 3:07 pm

    Hi Anita!
    How many cans did it take of each the primer and the white coat?

    Reply
    • Anita Fowler says

      November 7, 2017 at 1:04 am

      1 can of primer 2 of the white! I’ll add that to the post 🙂

      Reply

Trackbacks

  1. So Creative! - 12 Festive DIY Spring Projects! || Practically Functional says:
    February 29, 2016 at 3:39 pm

    […] How To Paint A Lamp Post from Live Like You Are Rich […]

    Reply

Leave a Reply Cancel reply

Your email address will not be published. Required fields are marked *

Primary Sidebar

Anita Fowler
Pinterest Facebook Twitter Youtube Gmail Gmail RSS

Most Popular


Footer

anita_livelikeyouarerich

How to live a rich life on any income. Stay-at-Home Mom to 4. 👦🏻👩🏻👧🏼👶🏻Wife 👩‍❤️‍👨Author 📖. Blogger 💻. Christian 🌟. #livelikeyouarerich #LivingRichTips

Family & Finances & Food-Anita
I’ve made this DIY Isabela Encanto Barbie Cake f I’ve made this DIY Isabela Encanto Barbie Cake for my daughter's birthday! 

Learn the Step-by-Step Process to Craft a Stunning Cake Inspired by the Enchanting World of Isabela Encanto. Perfect for Birthdays, Celebrations, and Unleashing Your Inner Cake Artist!

Try it! Get the recipe on the link in bio.

https://livelikeyouarerich.com/isabela-encanto-barbie-cake/

#IsabelaEncanto #BarbieCake #DIYCakes #birthdaycake #cake #birthdayparty #encantocake
I love these memory foam side table toppers! They I love these memory foam side table toppers! They can hold a lamp, books and other items I want to set on them yet are cushiony for my kids.

http://livelikeyouarerich.com/diy-memory-foam-side-table-toppers/ 

#sidetable #sidetables #memoryfoam #roomdecorationonabudget #diyproject #diy #crafts #decoration #homedecor #onabudget #budget #decorate
Behind the Scenes of Decal Detachment: Sharing the Behind the Scenes of Decal Detachment: Sharing the methods we use to remove stucco key stone decals effortlessly! 

Check out the link in the bio.

https://livelikeyouarerich.com/how-to-remove-stucco-key-stone-decals/

#stuccodecal #stucco #decal #stuccokeystones #exteriordecor #exterior #houseexterior #homerenovation #houseremodel
This is a tutorial on how to seal copper gutters t This is a tutorial on how to seal copper gutters to keep them from turning brown. This is the exterior renovation we did two years ago. My gutters took about 4 hours to seal and have been great for the past 2 years.

Share this tutorial to someone who might need it.

Link in bio.

https://livelikeyouarerich.com/how-to-seal-copper-gutters-to-keep-them-from-turning-brown/

#coopergutter #copper #gutter #coppergutter #diyprojects #diyexterior #fronthouse #diyhomeimprovement #homedecor
There are a lot of things you can do to make paint There are a lot of things you can do to make painting and stenciling more convenient, efficient, and not as messy. Here are 11 steps to take to paint and stencil an entire room.

Check out the instructions in the link in the bio.

http://livelikeyouarerich.com/how-to-paint-and-stencil-entire-rooms/ 

#homeupdates #nurseryroom #stencil #painting #homedecorating #diydecor #walldecor #roomdecor #homedecor #decor #diyprojects #diy #crafts #holidays #savemoney #craftymom #frugalliving
Here is a tutorial on how to make a ballerina tull Here is a tutorial on how to make a ballerina tulle crib skirt. Cute and girly way to dress up a crib. 

Share this with someone who might need it.

Click the link in the bio to get the step-by-step instructions.

https://livelikeyouarerich.com/how-to-make-a-ballerina-tulle-crib-skirt/

#ballerinatullecribskirt #ballerinatulle #diyproject #diy #crafts #nurseryroomdecor #nursery #decoration #momlife #motherhood #homedecor
Load More... Follow on Instagram

Links

  • About Me
  • Contact Me
  • Privacy Policy
  • Advertising/Media/Marketing Opportunities on LiveLikeYouAreRich.com

Disclosure Policy

Affiliate links may be used in this post. Printing a coupon or ordering a product through this link may result in a commission, which helps pay for the cost of running this site and keeps the content free. Read my full disclosure policy here.

Copyright © 2023