• Skip to primary navigation
  • Skip to main content
  • Skip to primary sidebar
  • Skip to footer

Live Like You Are Rich

on any income...

  • Finances
    • Save Money
    • Make Money
    • The Credit Game
    • Couponing
    • Tips & Warnings
    • Financial Fitness Bootcamp Course
  • LOVE with Family
    • Love
    • Pregnancy & Postpartum
    • Parenting
    • Faith
    • The Random & Important 
  • Home Improvements
    • Preparedness
    • Organization & Cleaning
    • Efficiency
    • Interior Design
    • Home Updates
    • Home One
    • Home Two
    • Home Three
  • DIY & Crafts
    • DIY’s & Crafts
    • Holidays
    • Valentines
    • Easter
    • 4th of July
    • Halloween
    • Thanksgiving
    • Christmas
  • Our Favorite Recipes
    • Quick and Easy Family Favorites
    • Breakfast
    • Lunch
    • Starters, Soups & Salads
    • Dinner
    • Desserts
    • Smoothies & Drinks
  • Hosting
  • My Book

How to Customize, Recover, and/or Reupholster a Crib Bumper Pad

August 8, 2014 By: Anita

Share to Your Social Media

  • Share
  • Tweet

How to Customize, Recover, and/or Reupholster a Crib Bumper Pad

With both my son’s and daughter’s nurseries I’ve wanted custom crib bumper pads… and I didn’t want to pay hundreds for them either! My mom helped me with my son’s and I felt comfortable enough to make my daughter’s.

It really isn’t that hard to do. If you can sew a straight line you can create a customized crib bumper pad.

I’ve found the least expensive way to make a custom bumper pad is to buy a bumper pad on sale, clearance, or at a garage sale (or take a used one that you may already have) and recover it/sew material on the outside of it.

For example, I found a brand new Baby Gap bumper pad for my son at a garage sale for $5.00. How to Customize, Recover, and/or Reupholster a Crib Bumper Pad

How to Customize, Recover, and/or Reupholster a Crib Bumper Pad

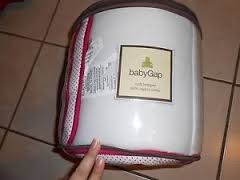
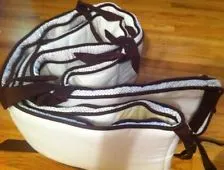
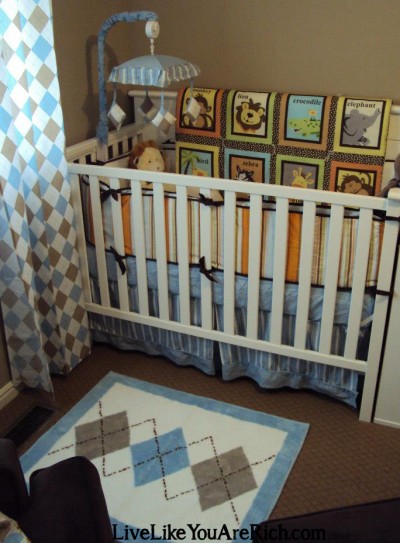
My mom and I customized it by sewing material onto the front that matched his nursery. We just used one type of fabric. Here is the finished product. To see his entire nursery click here.

How to Customize, Recover, and/or Reupholster a Crib Bumper Pad

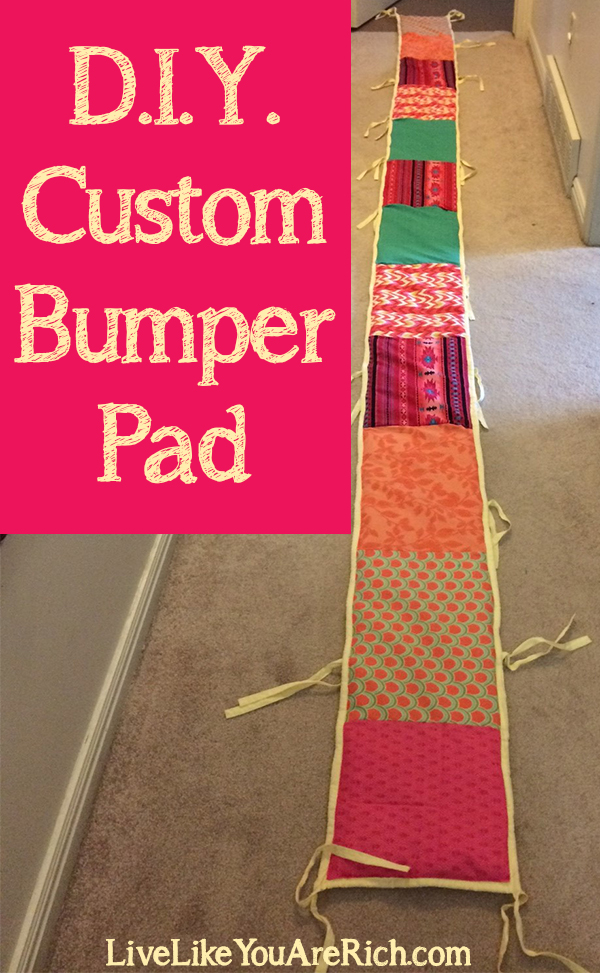
With my daughter I got a little more ambitious and pieced different patterns of fabric together before sewing it on the bumper pad.

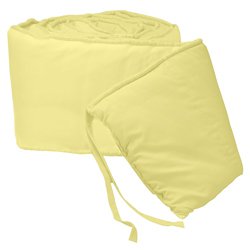
I found a yellow bumper pad (in like new condition) at a yard sale for $1.00. I washed it and began the project.

How to Customize, Recover, and/or Reupholster a Crib Bumper Pad


First, I took the material I wanted to use and cut them into smaller rectangular pieces. I pinned them to each other so that I could sew the blocks of fabric together.

How to Customize, Recover, and/or Reupholster a Crib Bumper Pad

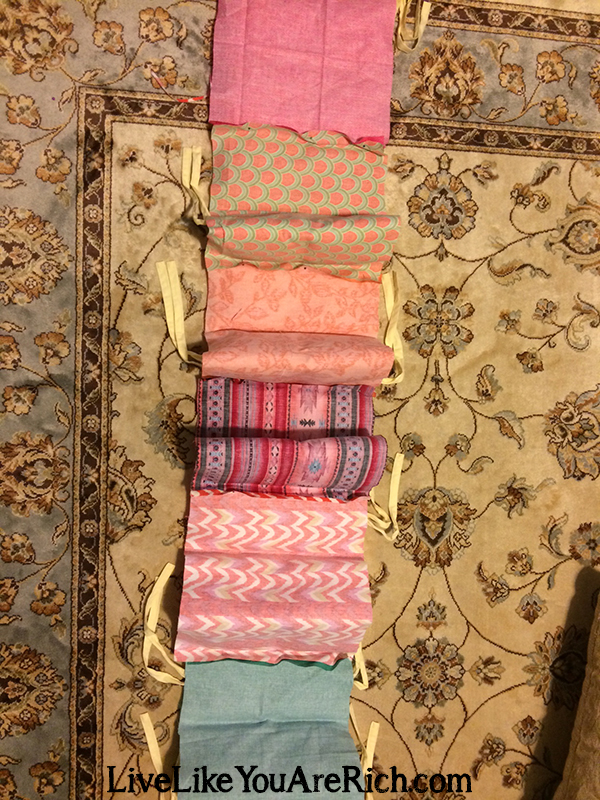
I sewed all the blocks together on the back side so you couldn’t see the stitching from the front. And because they were pinned well, the blocks were the right size and in the right order. How to Customize, Recover, and/or Reupholster a Crib Bumper Pad

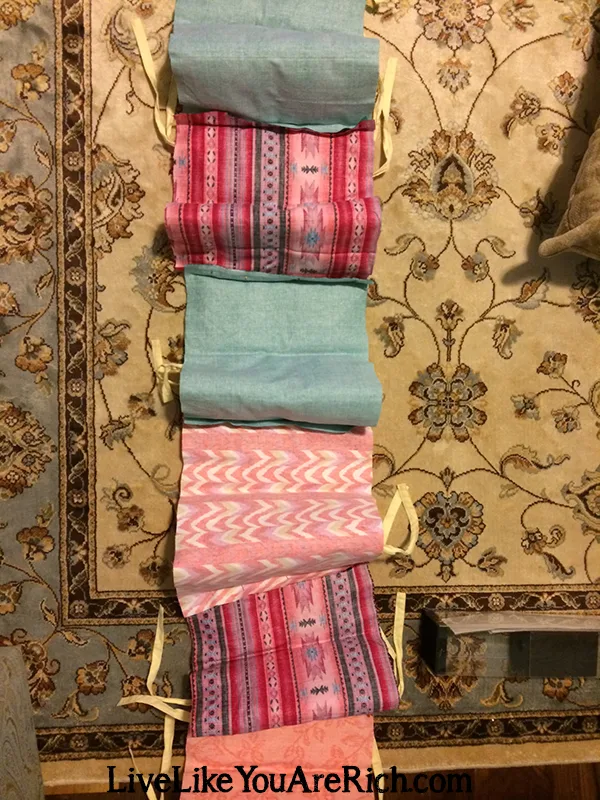
This is what it looked like after the fabric was sewn together, it became one long piece of fabric.

How to Customize, Recover, and/or Reupholster a Crib Bumper Pad

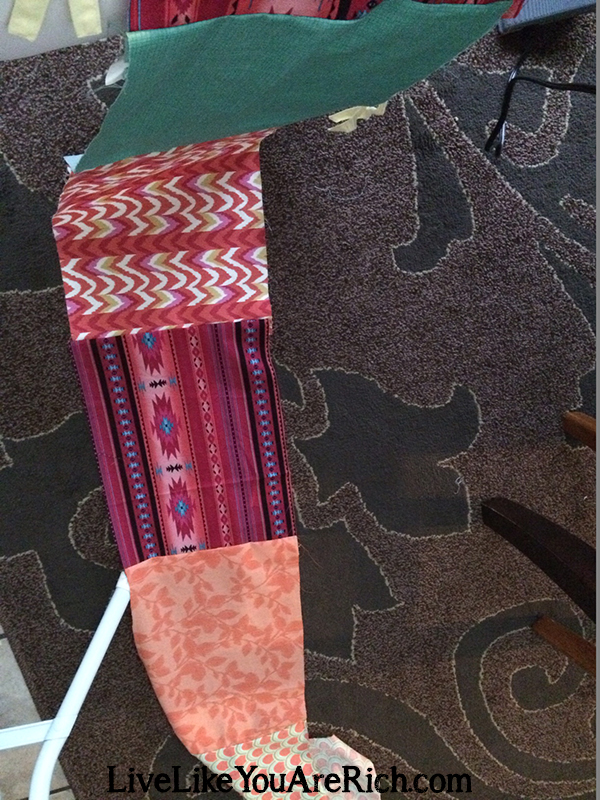
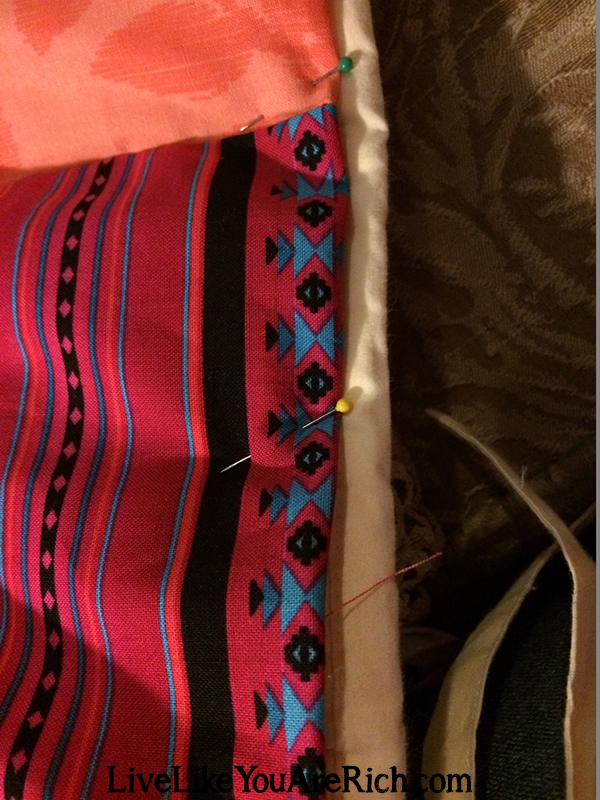
Next, I pinned this patchwork fabric to the bumper pad so that I could sew the top of the fabric (on the inside) to the bumper pad. I pinned it so that it would come out uniform/equal lengths.

How to Customize, Recover, and/or Reupholster a Crib Bumper Pad

Then carefully, using my finger to guide me so I didn’t sew the piping/edging of the bumper pad, I slowly sewed the inside top of the fabric onto the top of the bumper pad where the stitching already was from the edging.

I went very slowly so the needle wasn’t stressed and wouldn’t break. I also made sure that I wasn’t sewing over the bumper pad ties. It was very simple to do as long as I sewed very carefully and slowly. Again, watch those ties and make sure they don’t get sewn onto the backside of the pad.

How to Customize, Recover, and/or Reupholster a Crib Bumper Pad

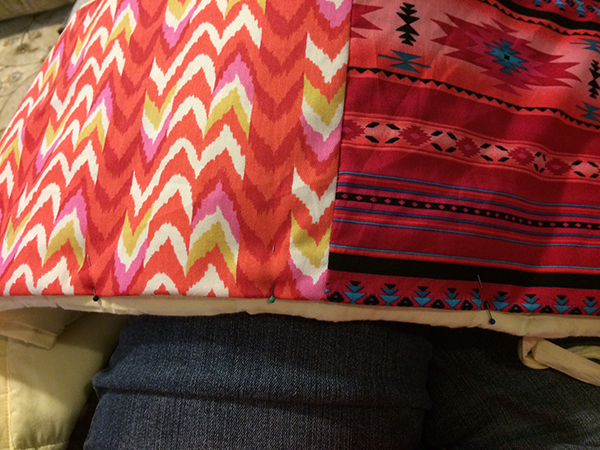
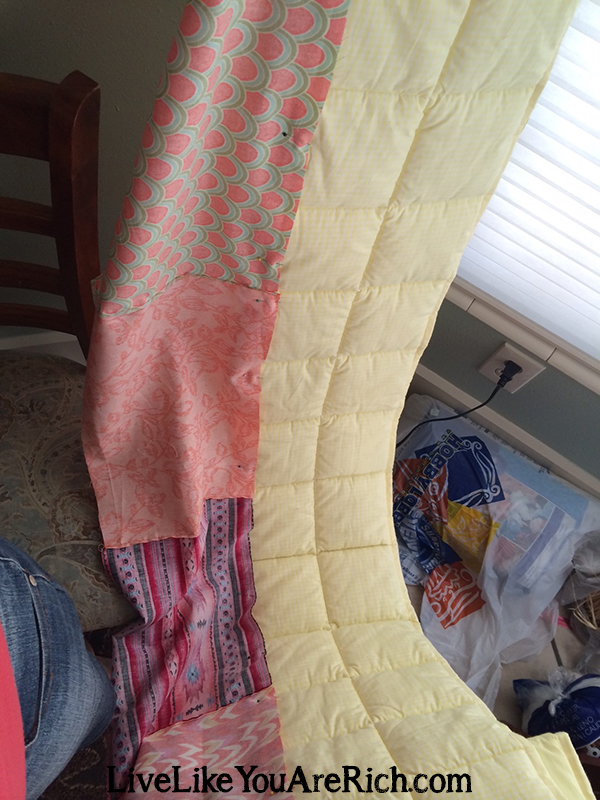
Once the top fabric was sewn on I folded the sides and the bottom under and pinned it as you see in the above and below photos.

How to Customize, Recover, and/or Reupholster a Crib Bumper Pad

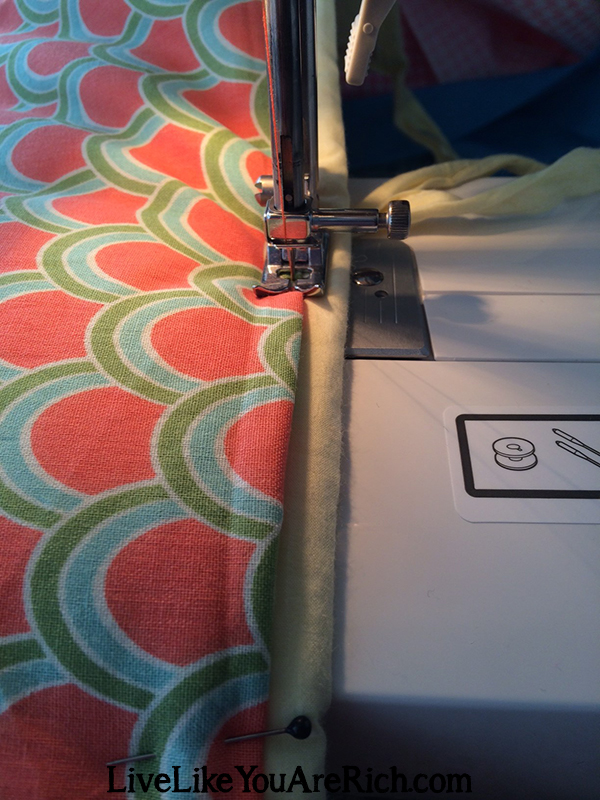
Last, I sewed along the top of the fabric as close to the piping/edging indent (where there were already sewn stitches from the existing edging) as I could.

Again, I went very slowly and carefully and made sure the ties were free and not tucked under the bumper where they could have been sewn on.

How to Customize, Recover, and/or Reupholster a Crib Bumper Pad

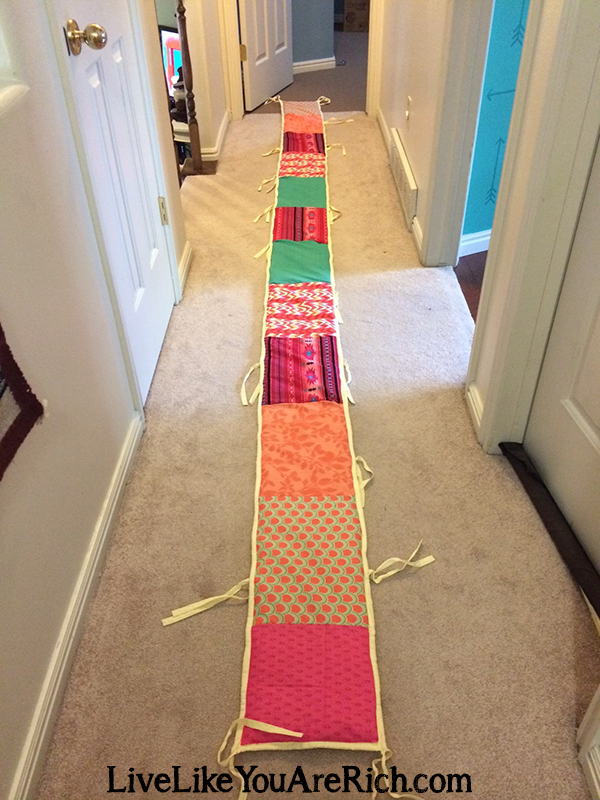
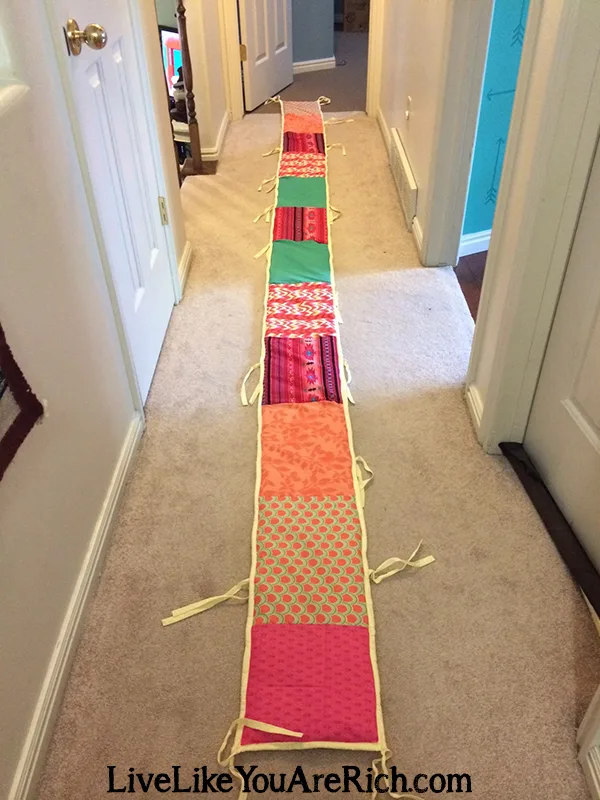
And the customized bumper pad is complete!

It was very easy to do and inexpensive too! I used material that was left over from a crib block quilt I made (tutorial on that coming soon). You can easily cover both sides with fabric if you’d like as well. I chose only to do one side.

How to Customize, Recover, and/or Reupholster a Crib Bumper Pad

To see the full nursery Click here.You won’t see the bumper pad in the nursery photos yet because I won’t put it on until my soon-to-be daughter can sit up and roll over, etc. Anita

For other ‘rich living’ and inexpensive DIY tips please subscribe, like me on Facebook, and follow me on Pinterest.

Related posts:

DIY Custom Curtains (Easy Sew) How to Make a Crib or Toddler Blanket How to Make a Crib Canopy out of Tulle
Previous Post: « How to Make Money Buying and Reselling Cheap Finds
Next Post: 7 Simple Tips to Combat Morning Sickness »

Reader Interactions

Comments

  1. Elizabeth says

    May 11, 2015 at 10:52 pm

    Thank you so much for this tutorial, I want to cover a bumper pad and still use the original ties. This looks like the perfect way to do that.

    Reply
    • Anita Fowler says

      May 22, 2015 at 12:26 pm

      You’re welcome! I hope it turns out great!

      Reply

Leave a Reply Cancel reply

Your email address will not be published. Required fields are marked *

Primary Sidebar

Anita Fowler
Pinterest Facebook Twitter Youtube Gmail Gmail RSS

Most Popular


Footer

anita_livelikeyouarerich

How to live a rich life on any income. Stay-at-Home Mom to 4. 👦🏻👩🏻👧🏼👶🏻Wife 👩‍❤️‍👨Author 📖. Blogger 💻. Christian 🌟. #livelikeyouarerich #LivingRichTips

Family & Finances & Food-Anita
Say hello to your new favorite breakfast or snack Say hello to your new favorite breakfast or snack - these delicious and fluffy banana bread muffins! 🙌 Try out my recipe and thank me later.

Tag someone who might need this.

The Recipe is in the link in bio.

https://livelikeyouarerich.com/banana-bread-muffins/

#bananabread #muffins #bananamuffins #recipe #recipes #breakfast #snacks #easyrecipes #recipeoftheday
Who knew zucchinis could taste this good? 😍 Try Who knew zucchinis could taste this good? 😍 Try this easy roasted zucchini recipe for a healthy and delicious meal! 

INGREDIENTS
* 2 medium zucchini
* 2 Tablespoons olive oil (or 2 Tablespoons butter—melted)
* 1 teaspoon dried oregano
* 1/2 teaspoon dried parsley
* 1/4 teaspoon garlic powder
* 1 pinch of salt
* 1 pinch of pepper
* 1/3 cup fresh parmesan

Get the recipe in the link in bio.

https://livelikeyouarerich.com/roasted-zucchini-recipe/

#foodie #healthyeating #zucchinirecipes #snacks #healthysnacks #roastedzucchinirecipe
February was full of amazing audiobooks! From thri February was full of amazing audiobooks! From thrillers to memoirs, here are my top picks. 🎉 

Share this with someone who might need it.

Link in bio.

https://livelikeyouarerich.com/audiobooks-i-listened-to-in-february-2023/

#audibooks #bookrecommendations #audiobooklove #bookworm #storytelling
Who says a trip to Great Wolf Lodge has to break t Who says a trip to Great Wolf Lodge has to break the bank? 🤑 My money-saving hacks will help you enjoy all the fun without the high price tag! 

Check out money-saving hacks in the link in the bio.

https://livelikeyouarerich.com/how-to-save-money-at-the-great-wolf-lodge-in-grapevine-tx/

#FrugalFamilyFun #GreatWolfLodge #TravelTips #familyvacation #travelwithkids #staycation #familystaycation
May your day be filled with pots of gold and rainb May your day be filled with pots of gold and rainbows 🌈🍀 Happy St. Patrick's Day!

#stpatricksday #stpatricksgreeting #greenday #irishluck
If you're expecting a boy and need some travel-the If you're expecting a boy and need some travel-themed nursery decor inspiration 🌏🌎👂☀️

I decorated this travel-themed boy nursery for my baby boy because I love to travel and I hope he has the wanderlust bug as well.

Tag a friend who needs this.�

Details are in the link in bio.

https://livelikeyouarerich.com/travel-themed-boy-nursery/

#travelthemednursery #babynursery #babynurserydecor #babynurseryideas #travelnursery #babyboynursery #babyboyroom #babyroomdecor #babyroomdecoration #babyroomideas #nurseryinspiration #nurseryideas #livelikeyouarerich #livingrichtips
Load More... Follow on Instagram

Links

  • About Me
  • Contact Me
  • Privacy Policy
  • Advertising/Media/Marketing Opportunities on LiveLikeYouAreRich.com

Disclosure Policy

Affiliate links may be used in this post. Printing a coupon or ordering a product through this link may result in a commission, which helps pay for the cost of running this site and keeps the content free. Read my full disclosure policy here.

Copyright © 2023